sometimes you got an error with ssh-agent mykey
Could not open a connection to your authentication agent.
then try this
exec ssh-agent bash
found here
sometimes you got an error with ssh-agent mykey
Could not open a connection to your authentication agent.
then try this
exec ssh-agent bash
found here
Example
ssh alice@275.128.172.46 -p 1500
instead
ssh website
Look here for more infos
Some time ago, I learned How to create a overlay network using Open vSwitch in order to connect LXC containers. Digging in the topic of overlay networks, I saw that linux bridges had included VXLAN capabilities, and also saw how some people were using it to create overlay networks in a LAN. As an example, it is made in this way in the OpenStack linux bridges plugin. So I decided to work by hand in this topic (in order to better understand how OpenStack was working) and learned…
Well, I do not know when OpenStack started to use overlay networks using Linux Bridges, but as I started to search for information on how to do it by hand, I realized that it is a widespread topic. As an example, I found this post from VMWare that is a must if…
View original post 2,177 more words
In the Windows environment, certain tasks require administrative privileges to be performed. However, starting a service doesn’t always require such privileges. This post will guide you through a simple solution that allows you to start a service without administrator rights.
Introduction
Normally, to start or stop a service in Windows, you’d need to have administrative rights. This can pose a challenge if you don’t have these permissions. But don’t worry, there are many ways to overcome this issue.
The Solution: Service Security Editor
During my search for a solution, I came across a very handy tool called the Service Security Editor on a Stack Overflow post.
The Service Security Editor is an easy-to-use tool that provides a graphical user interface (GUI) to configure access rights. With it, you can grant specific users the ability to start or stop services without giving them full administrative rights. It’s a powerful tool for managing service permissions in a granular way.
You can download the Service Security Editor from the official website.
Here’s a brief guide on how to use the Service Security Editor:
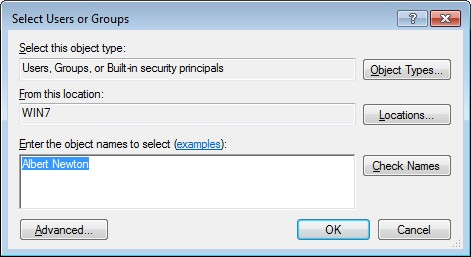
Choose your user: First, select the user account that you want to grant permissions to.
Define permissions: Next, configure what actions this user should be able to perform. In this case, we’re granting the user the ability to start and stop services.


Now, the selected user can start and stop services without needing administrative rights.
Create a file with name createiso.ps1 and fill this code into it.
function New-IsoFile
{
  <# .Synopsis Creates a new .iso file .Description The New-IsoFile cmdlet creates a new .iso file containing content from chosen folders .Example New-IsoFile "c:\tools","c:Downloads\utils" This command creates a .iso file in $env:temp folder (default location) that contains c:\tools and c:\downloads\utils folders. The folders themselves are included at the root of the .iso image. .Example New-IsoFile -FromClipboard -Verbose Before running this command, select and copy (Ctrl-C) files/folders in Explorer first. .Example dir c:\WinPE | New-IsoFile -Path c:\temp\WinPE.iso -BootFile "${env:ProgramFiles(x86)}\Windows Kits\10\Assessment and Deployment Kit\Deployment Tools\amd64\Oscdimg\efisys.bin" -Media DVDPLUSR -Title "WinPE" This command creates a bootable .iso file containing the content from c:\WinPE folder, but the folder itself isn't included. Boot file etfsboot.com can be found in Windows ADK. Refer to IMAPI_MEDIA_PHYSICAL_TYPE enumeration for possible media types: http://msdn.microsoft.com/en-us/library/windows/desktop/aa366217(v=vs.85).aspx .Notes NAME: New-IsoFile AUTHOR: Chris Wu LASTEDIT: 03/23/2016 14:46:50 #>

  [CmdletBinding(DefaultParameterSetName='Source')]Param(
    [parameter(Position=1,Mandatory=$true,ValueFromPipeline=$true, ParameterSetName='Source')]$Source,
    [parameter(Position=2)][string]$Path = "$env:temp\$((Get-Date).ToString('yyyyMMdd-HHmmss.ffff')).iso",
    [ValidateScript({Test-Path -LiteralPath $_ -PathType Leaf})][string]$BootFile = $null,
    [ValidateSet('CDR','CDRW','DVDRAM','DVDPLUSR','DVDPLUSRW','DVDPLUSR_DUALLAYER','DVDDASHR','DVDDASHRW','DVDDASHR_DUALLAYER','DISK','DVDPLUSRW_DUALLAYER','BDR','BDRE')][string] $Media = 'DVDPLUSRW_DUALLAYER',
    [string]$Title = (Get-Date).ToString("yyyyMMdd-HHmmss.ffff"),
    [switch]$Force,
    [parameter(ParameterSetName='Clipboard')][switch]$FromClipboard
  )

  Begin {
    ($cp = new-object System.CodeDom.Compiler.CompilerParameters).CompilerOptions = '/unsafe'
    if (!('ISOFile' -as [type])) {
      Add-Type -CompilerParameters $cp -TypeDefinition @'
public class ISOFile
{
  public unsafe static void Create(string Path, object Stream, int BlockSize, int TotalBlocks)
  {
    int bytes = 0;
    byte[] buf = new byte[BlockSize];
    var ptr = (System.IntPtr)(&bytes);
    var o = System.IO.File.OpenWrite(Path);
    var i = Stream as System.Runtime.InteropServices.ComTypes.IStream;

    if (o != null) {
      while (TotalBlocks-- > 0) {
        i.Read(buf, BlockSize, ptr); o.Write(buf, 0, bytes);
      }
      o.Flush(); o.Close();
    }
  }
}
'@
    }

    if ($BootFile) {
      if('BDR','BDRE' -contains $Media) { Write-Warning "Bootable image doesn't seem to work with media type $Media" }
      ($Stream = New-Object -ComObject ADODB.Stream -Property @{Type=1}).Open()  # adFileTypeBinary
      $Stream.LoadFromFile((Get-Item -LiteralPath $BootFile).Fullname)
      ($Boot = New-Object -ComObject IMAPI2FS.BootOptions).AssignBootImage($Stream)
    }

    $MediaType = @('UNKNOWN','CDROM','CDR','CDRW','DVDROM','DVDRAM','DVDPLUSR','DVDPLUSRW','DVDPLUSR_DUALLAYER','DVDDASHR','DVDDASHRW','DVDDASHR_DUALLAYER','DISK','DVDPLUSRW_DUALLAYER','HDDVDROM','HDDVDR','HDDVDRAM','BDROM','BDR','BDRE')

    Write-Verbose -Message "Selected media type is $Media with value $($MediaType.IndexOf($Media))"
    ($Image = New-Object -com IMAPI2FS.MsftFileSystemImage -Property @{VolumeName=$Title}).ChooseImageDefaultsForMediaType($MediaType.IndexOf($Media))

    if (!($Target = New-Item -Path $Path -ItemType File -Force:$Force -ErrorAction SilentlyContinue)) { Write-Error -Message "Cannot create file $Path. Use -Force parameter to overwrite if the target file already exists."; break }
  }

  Process {
    if($FromClipboard) {
      if($PSVersionTable.PSVersion.Major -lt 5) { Write-Error -Message 'The -FromClipboard parameter is only supported on PowerShell v5 or higher'; break }
      $Source = Get-Clipboard -Format FileDropList
    }

    foreach($item in $Source) {
      if($item -isnot [System.IO.FileInfo] -and $item -isnot [System.IO.DirectoryInfo]) {
        $item = Get-Item -LiteralPath $item
      }

      if($item) {
        Write-Verbose -Message "Adding item to the target image: $($item.FullName)"
        try { $Image.Root.AddTree($item.FullName, $true) } catch { Write-Error -Message ($_.Exception.Message.Trim() + ' Try a different media type.') }
      }
    }
  }

  End {
    if ($Boot) { $Image.BootImageOptions=$Boot }
    $Result = $Image.CreateResultImage()
    [ISOFile]::Create($Target.FullName,$Result.ImageStream,$Result.BlockSize,$Result.TotalBlocks)
    Write-Verbose -Message "Target image ($($Target.FullName)) has been created"
    $Target
  }
}
After file creation, you must import this module to your open powershell session.
Import-Module .\createiso.ps1Now you can define on powershell your source folder
$source_dir = "Z:\isofilel\"

We can create our ISO file
get-childitem "$source_dir" | New-ISOFile -path C:\iso\mydmz.isoThere’s lots of content already out there about puppet CI testing; this is what I initially came up with using GitLab CI, and with various other improvements such blogged about previously in posts tagged gitlab-runner such as:
Running under a shell executor initially, this is my CI setup.
# ci/definition.yml before_script: - /bin/bundle install --gemfile=ci/Gemfile stages: - syntax - lint - git lint: stage: lint script: - BUNDLE_GEMFILE=ci/Gemfile /bin/bundle exec rake --rakefile ci/rakefile_lint lint syntax-manifests: stage: syntax script: - BUNDLE_GEMFILE=ci/Gemfile /bin/bundle exec rake --rakefile ci/rakefile_syntax syntax:manifests syntax-templates: stage: syntax script: - BUNDLE_GEMFILE=ci/Gemfile /bin/bundle exec rake --rakefile ci/rakefile_syntax syntax:templates syntax-hiera: stage:…
View original post 464 more words
Systemd have loots of tools to analyses boot performance on your system. If you want this to display graphical then use this command.
We want to display the bluetooth stack.
systemd-analyze dot 'bluetooth*' | dot -Tsvg > blue.svg

If you want to see the complete boot sequence from systemd use this command.
systemd-analyze plot > complete_systemd_boot.svg
If you want to display your current hardware topolgy, you can use lstopo. On Single CPU Systems are not really interesting. On multi socket systems are more exciting.
lstopo
lstopo-no-graphics
under suse you can install zypper install hwloc

What a heck. Installed a fresh Suse tumbleweed and Twitch is not running. All Browsers have an error 4000.
You must install some codecs. How it works?
openSUSE Tumbleweed:
sudo zypper addrepo -cfp 90 'https://ftp.gwdg.de/pub/linux/misc/packman/suse/openSUSE_Tumbleweed/' packman
openSUSE Leap:
sudo zypper addrepo -cfp 90 'https://ftp.gwdg.de/pub/linux/misc/packman/suse/openSUSE_Leap_$releasever/' packmanfor all systems the same command
sudo zypper refresh
sudo zypper dist-upgrade --from packman --allow-vendor-changesudo zypper install --from packman ffmpeg gstreamer-plugins-{good,bad,ugly,libav} libavcodec-full vlc-codecsthats it
found here
You are tired from openvpn performance issues. You want to use more opensource software? You wan to replace your Cisco ASA but don’t want to give up annyconnect VPN client software?
You want a reliable VPN server for your business? I found a solution for your requirements.
OpenConnect VPN Server called OCSERV
https://ocserv.gitlab.io/www/
You can use the AnnyConnect client to dial in to OCSERV VPN server or openconnect VPN client.
On Debian/Ubuntuapt install ocserv
You have installed the VPN Server but in Enterprise enviroments that is not enough for security. You want to use this for hundred or thousand of employees.
I want to show you my configuration of OCSERV and RADIUS integration with Privacyidea a two factor opensource solution.
If you want to use OCSERV with RADIUS please read this first
https://ocserv.gitlab.io/www/recipes-ocserv-authentication-radius-radcli.html
You have to compile radcli from source first without this you have no RADIUS functionality.
Look at https://github.com/radcli/radcli/releases for the latest version
How to compile
https://ocserv.gitlab.io/www/recipes-ocserv-radcli-installation.html
Fill the information for your radius server under
/etc/radcli/radiusclient.conf
nas-identifier fw01
authserver 10.10.10.50
acctserver 10.10.10.50
servers /etc/radcli/servers
dictionary /etc/radcli/dictionary
default_realm
radius_timeout 10
radius_retries 3
bindaddr *
cat /etc/radcli/servers
# Server Name or Client/Server pair            Key
## ----------------                             ---------------
#
#portmaster.elemental.net                       hardlyasecret
#portmaster2.elemental.net                      donttellanyone
#
## uncomment the following line for simple testing of radlogin
## with freeradius-server
#
#localhost/localhost                            testing123
#
10.10.110.60 yourradiussecrectkey
After you have compile radcli on the system you can choose to install ocserv from the distribution repository or to compile it from source. I have use the repository from the distribution.
add following to the
ocserv.conf
auth = “radius[config=/etc/radcli/radiusclient.conf,groupconfig=true]”
Fixing some errors…
custom-header = “X-CSTP-Client-Bypass-Protocol: true”
Add your own certificate for your domain
server-cert =
server-key =
VPN Pool
ipv4-network = 10.10.100.128
ipv4-netmask = 255.255.255.128
Add route to network that you want to reach form the vpn server
route=
